Control rigging with Modular rigging tools for Maya
In the last part, we finished with building all the necessary scene modules for describing the rig, so now we will create a character. What’s going to happen now is that all the information from the modules will be gathered and processed internally to produce character joint hierarchies. Depending on the module relationships that you’ve set-up, each hierarchy can be applied with one or more control rigs depending on its type, such as a joint hierarchy for an arm consisting of three joints constructed from a hinge module will require an IK control rig. The application of a control rig that can be applied to a joint hierarchy can be divided into two broader cases, one where the joint hierarchy was built directly from a module, in case of the arm built from hinge module, and if the joint hierarchy was created from multiple modules by using hierarchical modular relationship between them.
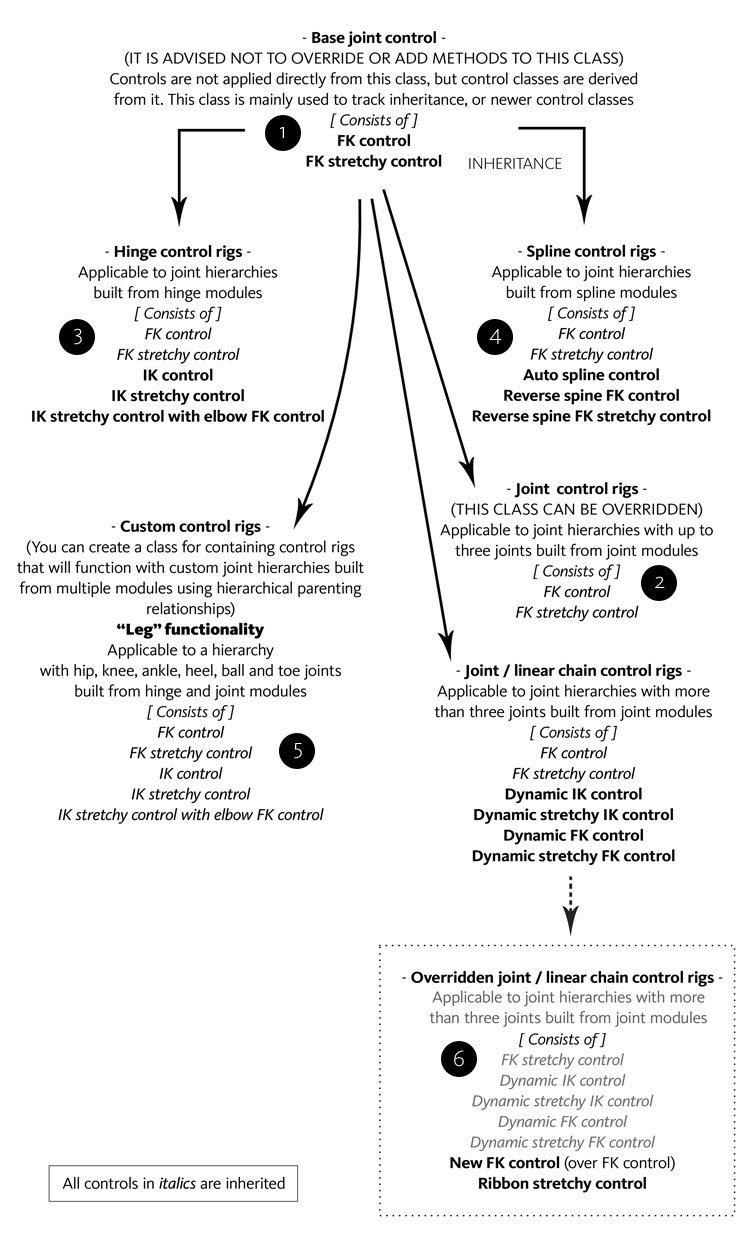
To better understand how control rig application will work for character joint hierarchies, consider the diagram below. Under the hood, the control rigging framework consists of collections of controls that can only be applied to a specific character joint hierarchy. Technically, each control collection is a group of methods in a class which derives/inherits its base methods from a base control collection/class (1) and is extended to include methods specific to the character hierarchy to which it can be applied. The base class (Base joint control) control methods cannot be applied directly except the control methods which belong to classes that are derived from it. The control methods inside the base class (FK and FK stretchy) is applicable to any joint hierarchy and hence they can be inherited in a new control class that is defined. The control rig collections or classes (2, 3 and 4) derived from the base collection (one-level) are restricted to joint hierarchies according to the type of modules they were created from. The spline control rig class (4) inherited from the base joint control class will have all the controls methods from it, in addition to its own methods, and can only be applied to a joint hierarchy created from a spline module (In the diagram, all control rig methods described in italics, which are a part of a class are derived). Going further, you can also derive a control rig collection from the base (one-level), which can be only be applied to joint hierarchies which are created from multiple module types by using hierarchical parent relationships between the modules (refer to part III). For example, a custom joint hierarchy might have to be created for a biped leg which requires the hip, knee and ankle joints in an IK plane, so it’ll have to be created from a hinge module, but then you also have to create foot joints, i.e, heel, ball and toe from joint modules, which forms the entire leg hierarchy. Therefore, you have to write a control rig class specific for biped “leg” functionality (5) which is a derived class and its control methods can be applied to a custom leg joint hierarchy, which will drive all the joints in it, by using a method, such as a reverse foot control. In general, you can also modify/override and extend any control rig collection/class derived from base class (two or more level). Here, for linear joint chains built from joint modules (6) can be included with updated functionality or with a new control rig method such as a ribbon stretchy control (an example). The control rig framework will identify this and will use the newer collection/class information:
Now, if you’re only interested in using the tools, this information might not be pertinent, but it’s good to know how it works. The only important information to know here is to use hierarchical relationships for module parenting when it’s necessary to get specific functionality with control methods when rigging a specific part of a character which requires a custom joint hierarchy, which can’t be constructed with a single module.
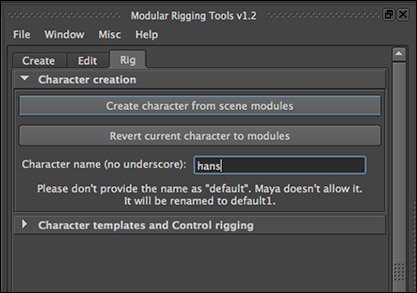
Before we can use control rigging, we need to create a character as described before. Simply go to Character creation and provide a character name and execute Create character from scene modules (7). All your modules will be converted to joint hierarchies with proxy geometry attached, if any, along with a global controls, i.e, a character root control ROOT_CNTL and world control WORLD_CNTL.
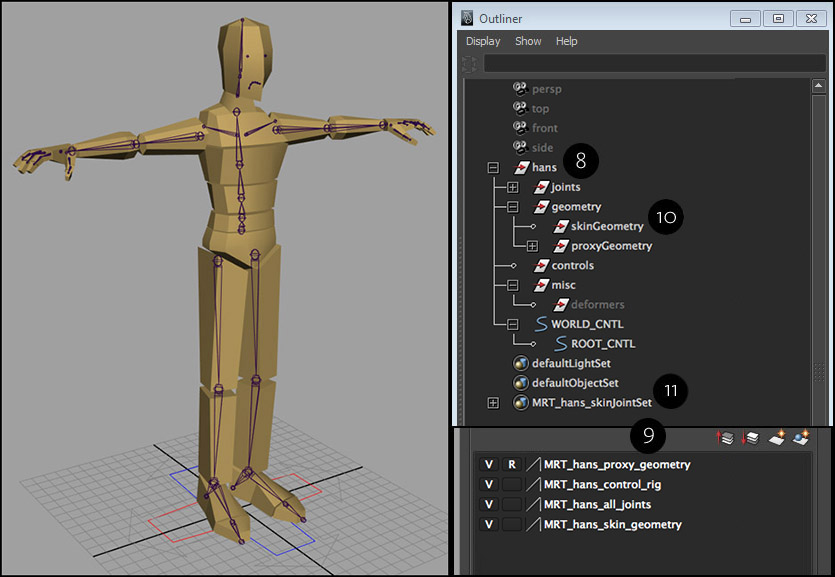
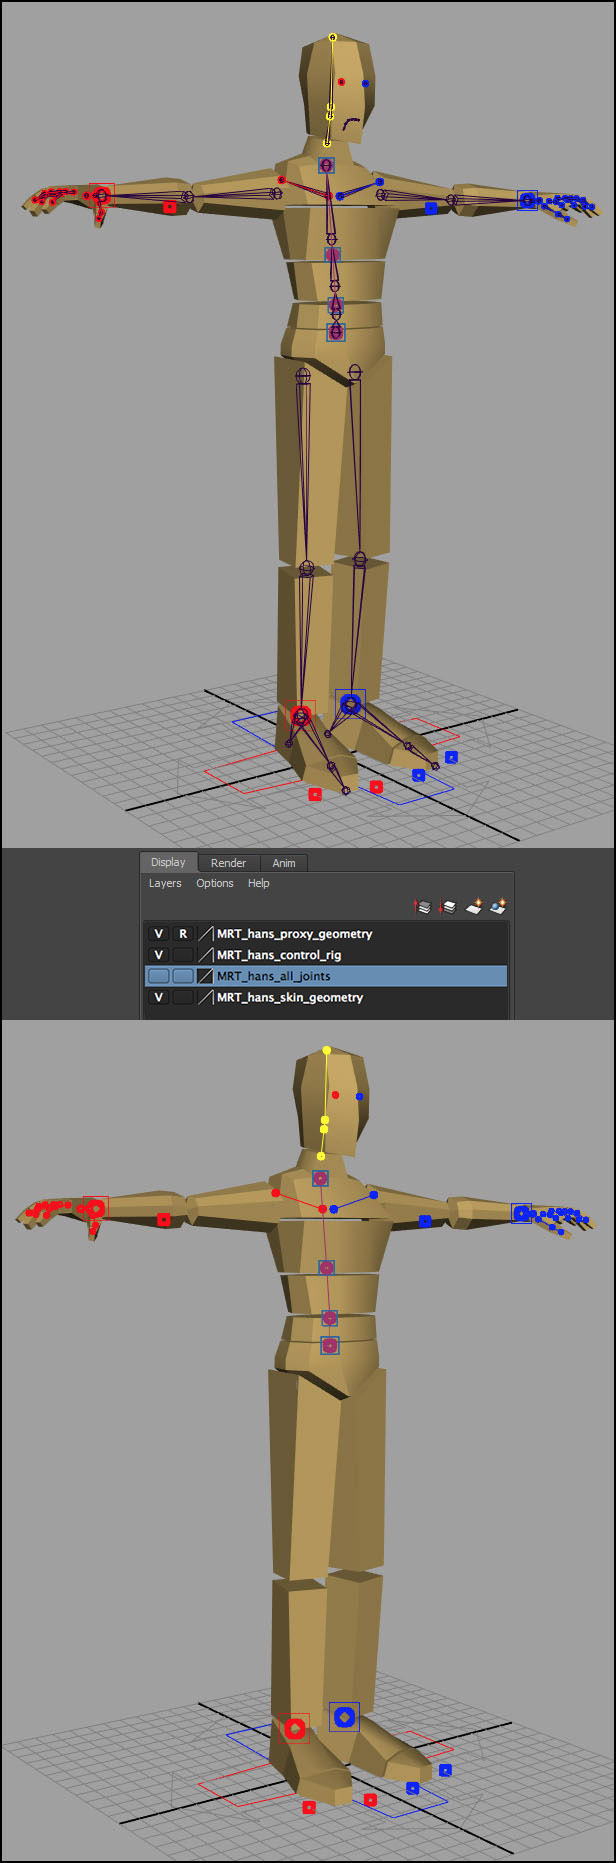
You will notice in the scene that all the modules have been removed as well since they’re not needed any more. The character now is composed of distinct joint hierarchies, i.e, for legs, spine, arms, etc that are easily identifiable. All the objects are organized under a main group, named after the given character name (8). All the scene objects are placed under named display layers for toggling their visibility/selection states (9). The proxy geometry is now driven by the joints and is referenced. If you have an existing skin geometry for the character, you should place it under <characterName>|geometry|skinGeometry (10). For binding the skin geometry, you can use the self-generated set MRT_<characterName>_skinJointSet (11) to select the relevant joints from the character hierarchy.
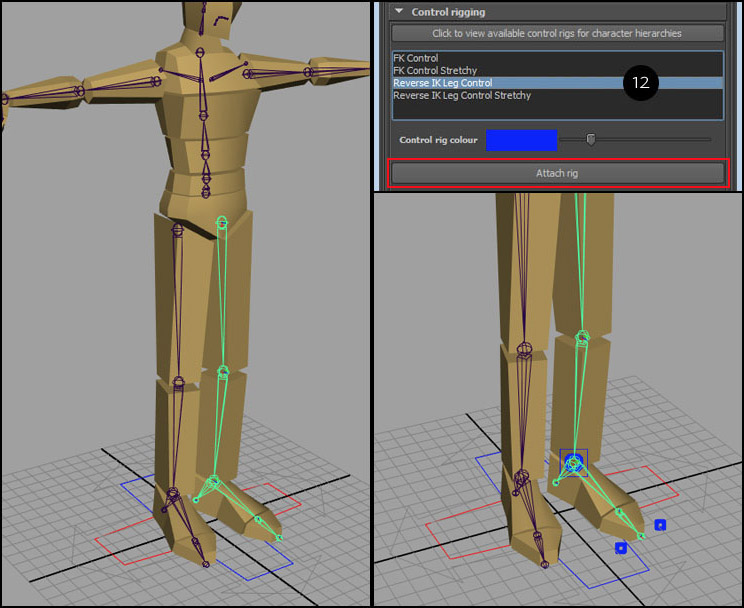
With that done, now you’re ready to apply control rigging to character joints. Do not try to construct controls to these joints on your own, since their transform channels have incoming connections and they cannot be manipulated. I wouldn’t recommend breaking them since the control rigging application will no longer work. All you have to do is to select a joint hierarchy and you’d see the available control rigs that can be applied under the control rigging tab. You can select the control rig of your choice and click Attach Rig. For this example, we will use Reverse IK leg control (12).
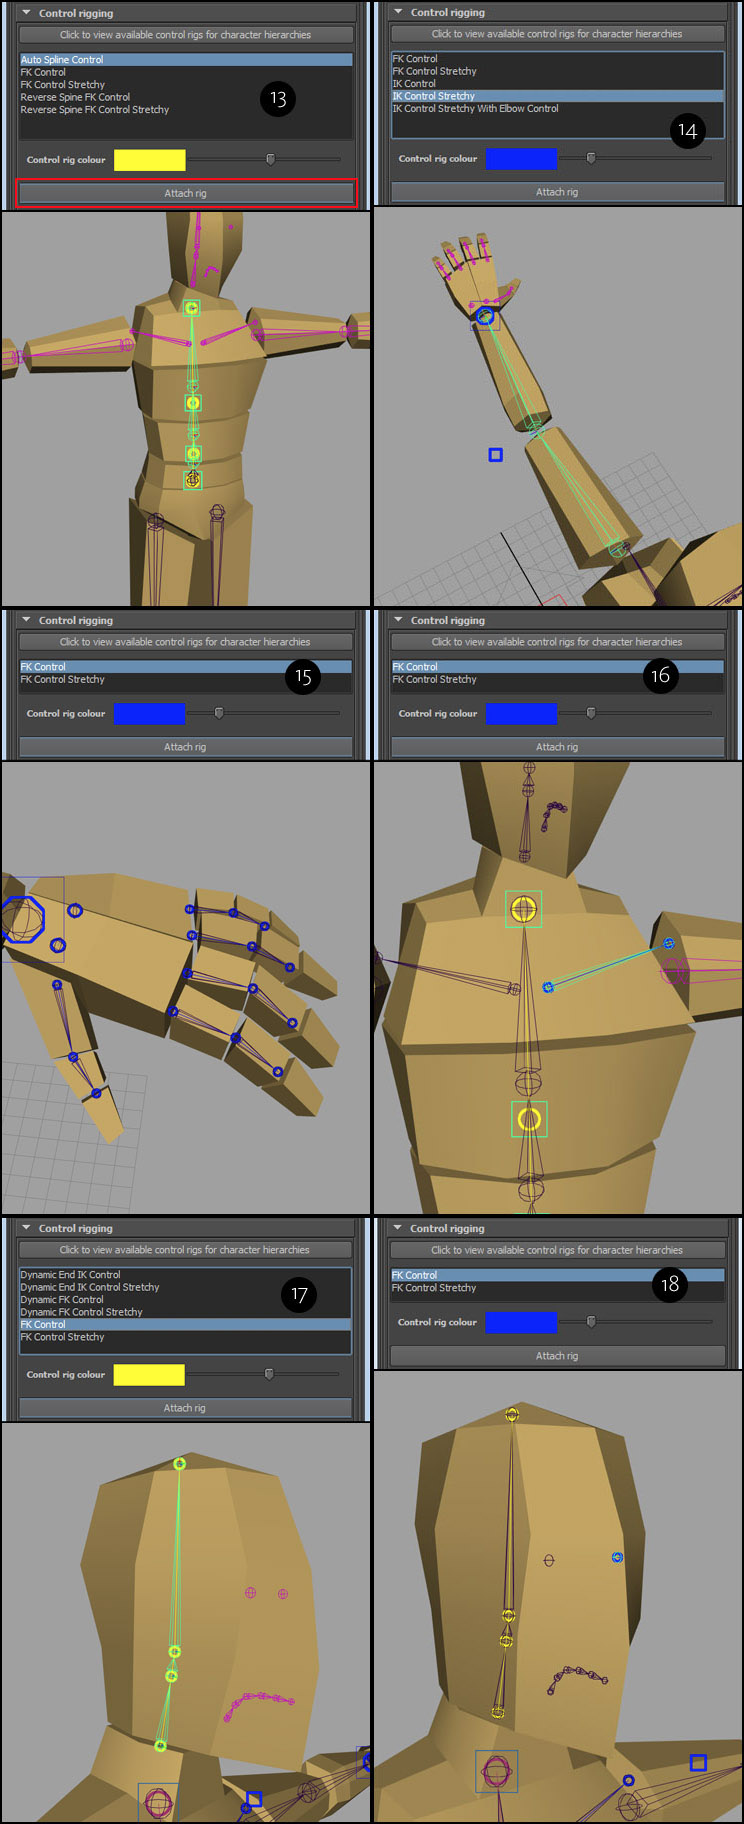
Similarly, you can apply reverse control rig to the right leg hierarchy. Continue applying control rigging to all character joint hierarchies as shown below. Apply to Spine (13), Arm (14), Hand/Fingers (15), Clavicle (16), Head (17) and Eyes (18).
Now that all the control rigs to the joint hierarchies have been applied, you can turn off the visibility of the character joint display layer.
Now you can pose and animate the character controls. To hide the controls, turn off the visibility of the control rig display layer.
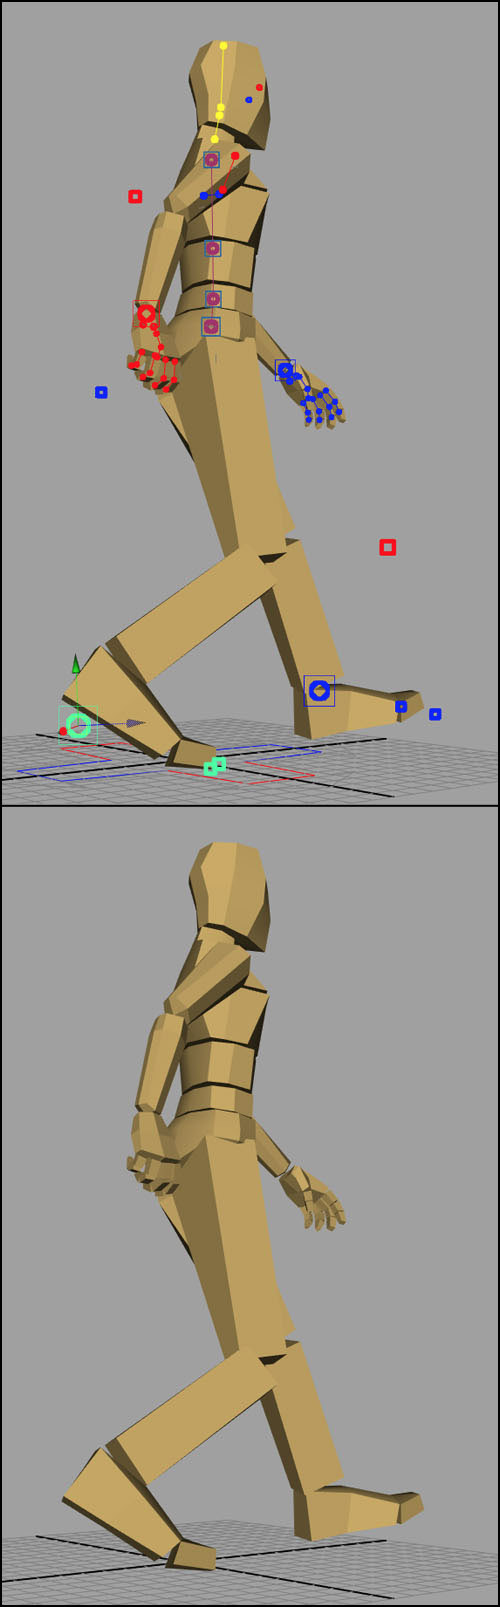
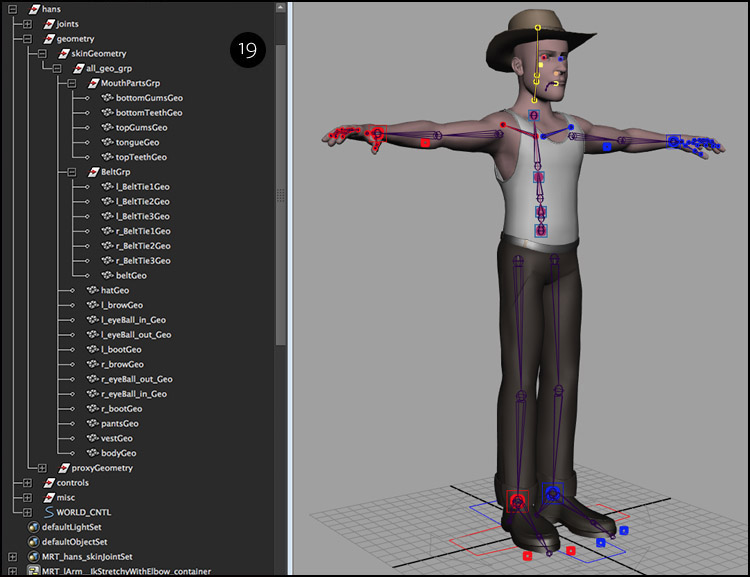
Thus, you have successfully rigged a custom character. To finish, you can now bind your character character geometry to the joints. To proceed, you have to put all the custom character geometry under <characterName>|geometry|skinGeometry (19). For this example, I have grouped all the geometry with the group all_geo_grp, under it. Now you can toggle the visibility of all the custom geometry with the MRT_<characterName>_skin_geometry display layer.